Creating Your First Web Page
It is now time to create your first Web page and view it in your browser. This page is not very fancy but it will
familiarize you with the process of coding, editing, saving, and retrieving a page for display in your browser. Begin
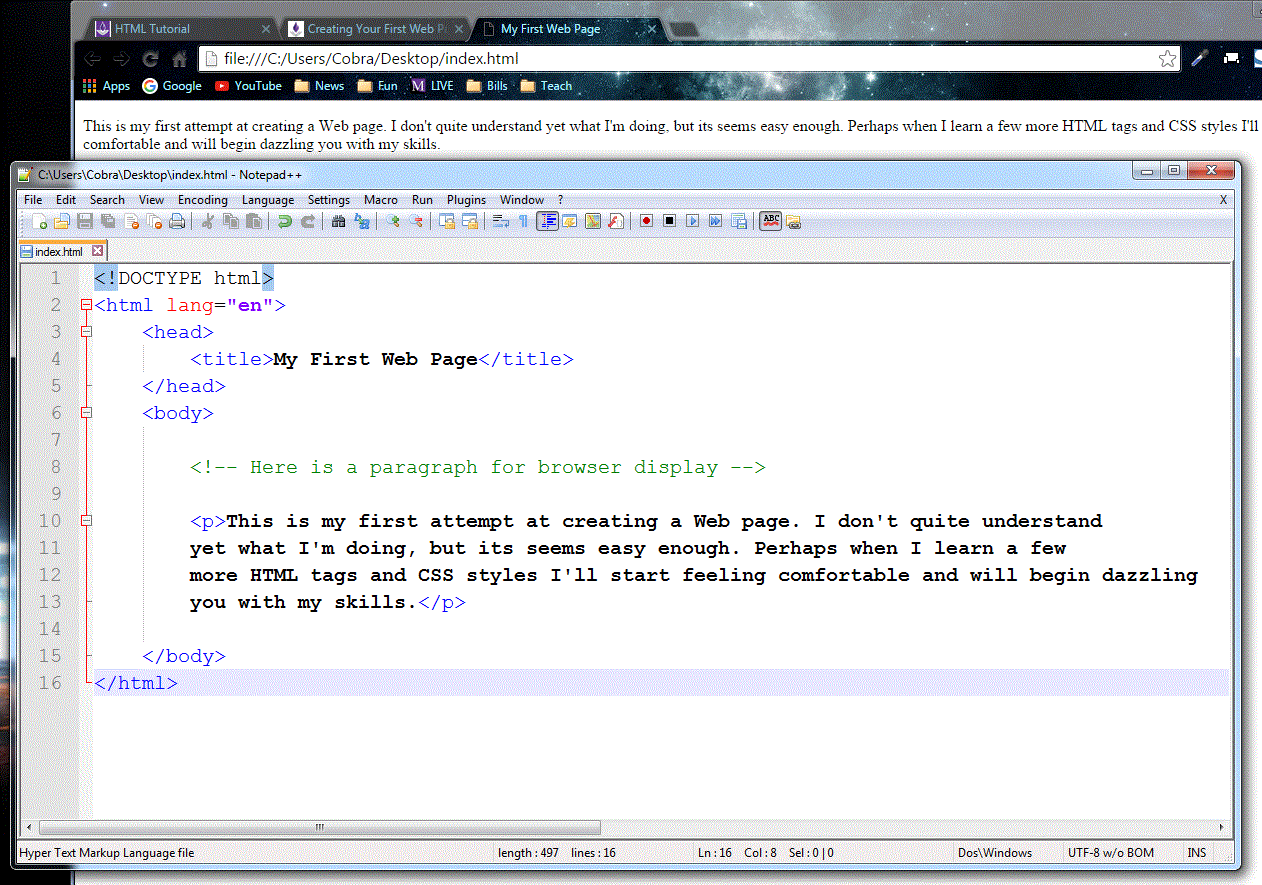
by opening the Notepad++ editor and enter the text and code shown in the following listing.
<!DOCTYPE html>
<html lang="en">
    <head>
        <title>My First Web Page</title>
    </head>
    <body>

        <!-- Here is a paragraph for browser display -->

        <p>This is my first attempt at creating a Web page. I don't quite understand
        yet what I'm doing, but its seems easy enough. Perhaps when I learn a few
        more HTML tags and CSS styles I'll start feeling comfortable and will begin dazzling
        you with my skills.</p>

    </body>
</html>
Listing 1-13. Coding your first web page.
When entering the text paragraph, it is not necessary to type it line for line as in the example. If your
editor permits word wrapping, you can take advantage of that; otherwise, and perhaps preferably, you can enter
line breaks to maintain a consistent editing format. Remember, the browser ignores any spaces, tabs, and blank
lines you enter in the editor, so type the information in the readable format you prefer.

Figure 1.20.
Web page coding in Notepad++.
HTML Comments
It is usually a good idea to place comments in your Web document to describe its various sections. Comments
are general descriptions or explanations of HTML code. These serve as useful reminders of the purposes or
contents of sections of code when you or someone else returns at a later time to edit the document. In the
above example, a general comment has been placed at the beginning of the <body> section.
<!-- Here is a paragraph for browser display -->
Comments are coded between a pair of <!-- and --> tags.
These tags can enclose a single-line comment as illustrated above,
or they can enclose multiple lines of HTML coding. Any code or text appearing between these symbols is
ignored by the browser and does not show up on the page.
Besides their use for including comments in a document, comment tags can be used to temporarily suspend the browser
display of a section of code. This purpose is often useful in "debugging" your page, that is, in trying to discover errors
by selectively removing sections of code from display until the problem is isolated.
Saving and Displaying Your Web Page
After coding the page, save the document so that it can be retrieved by your browser. Where you save the
document depends on your development environment. If you are working on a standard desktop PC, save the document
to a diskette or to a folder on your hard drive. Remember to save the document with the special file extension
.html. Save this current document under the name FirstPage.html or any other name of your choosing.
Now, open your browser and retrieve the page. You should leave your editor open on the desktop so that
it is handy for making corrections or changes to your page. If you had coded your document as in the example
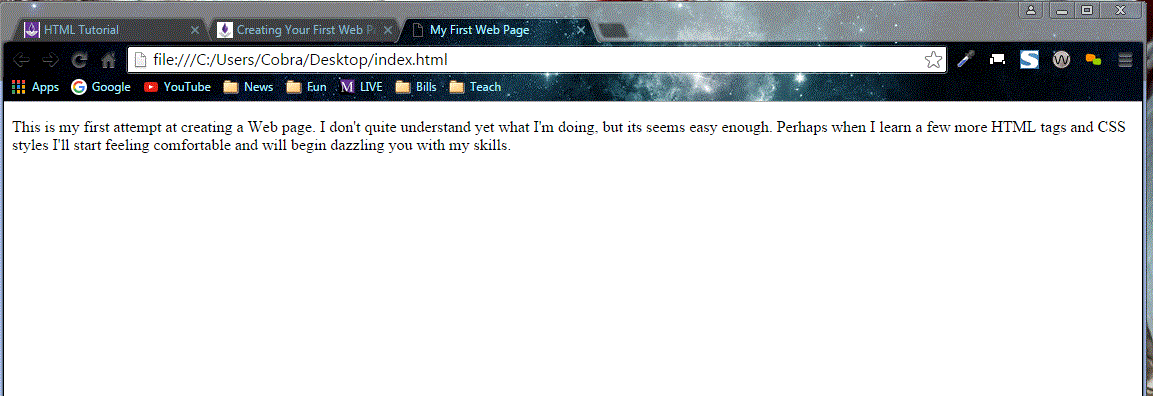
above, your Web page should appear in the browser window similar in style to that shown below. This page has
been retrieved from the local hard drive and displayed in the browser.

Figure 1-21.
Browser display of your first Web page.
Note that this browser display is not a full-size window, so your line lengths may appear slightly different. This difference
illustrates the fact that the browser renders the document to fit within the dimensions of its display window. Any text on the
page has its line lengths adjusted and word-wrapped to fit the window no matter how large or small the window has been sized.
Now that you have a basic feel for the process of coding and viewing Web pages, you can begin learning the HTML tags to make
your documents more presentable. In the next section of the tutorial, tags are presented that control the structure of Web
pages and the ways in which blocks of text are displayed.